


When you’re trying to find a stud for nailing, drilling or anchoring, what you really need to find is the centre of the stud. By using our products properly and taking advantage of the “Dual Scan and Mark Procedure”, you’ll know you’re getting accurate results. Damaged walls filled with stray holes are now a concern of the past.
Step 1
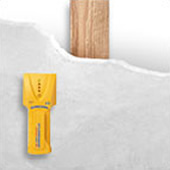
Hold the StudSensor™ stud finder flat against the wall. Make sure you keep the sensing surface flush with the wall at all times to prevent false readings.

Step 2
Turn on your StudSensor™ tool by pressing the button on the side. It will flash for a moment while calibrating to the density of your wall.
Step 3
Slowly slide the tool to the right or left. If the tool starts beeping and flashing, you inadvertently turned it on over a stud. This “Over-the-Stud Warning” prevents a bad calibration that may lead to inaccurate results. Just move a few inches to the right or left and start over at step one.
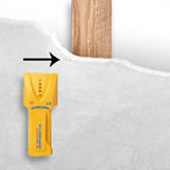
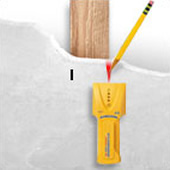
Step 4
As you slide it across the wall, your StudSensor™ stud finder will indicate when you find a stud edge. Mark this spot.
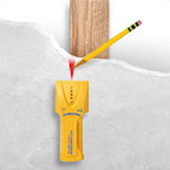
How your StudSensor™ tool indicates this will vary by model:
- Standard StudSensor™ stud finders – An array of LEDs convey proximity. An audible tone will indicate the edge.
- SL models – SpotLight® Pointing System, as illustrated here.
Step 5
Start again from the opposite direction.
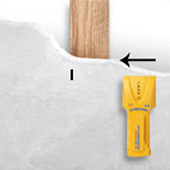
Step 6
Find and mark the other edge of the stud. Take your time so that you don’t miss it.
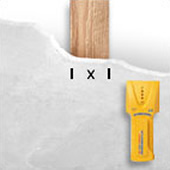
Step 7
The spot halfway between your two marks is your centre of the stud. That’s it, you’re done.